5-minute tutorial
Install LibrAgent and complete your first agent chat. No dev setup — download the desktop app.
What you will learn
- Launch LibrAgent
- Set an API key and default model in Settings
- Start a session from an assistant card in Chat
- Use App Wizard and setup-wizard (alias
bootstrap) for environment setup
Time: ~5 minutes
Need: LibrAgent app, network, a provider API key
Step 1: Launch LibrAgent
Download the installer for your OS from GitHub Releases, install, and open the app.
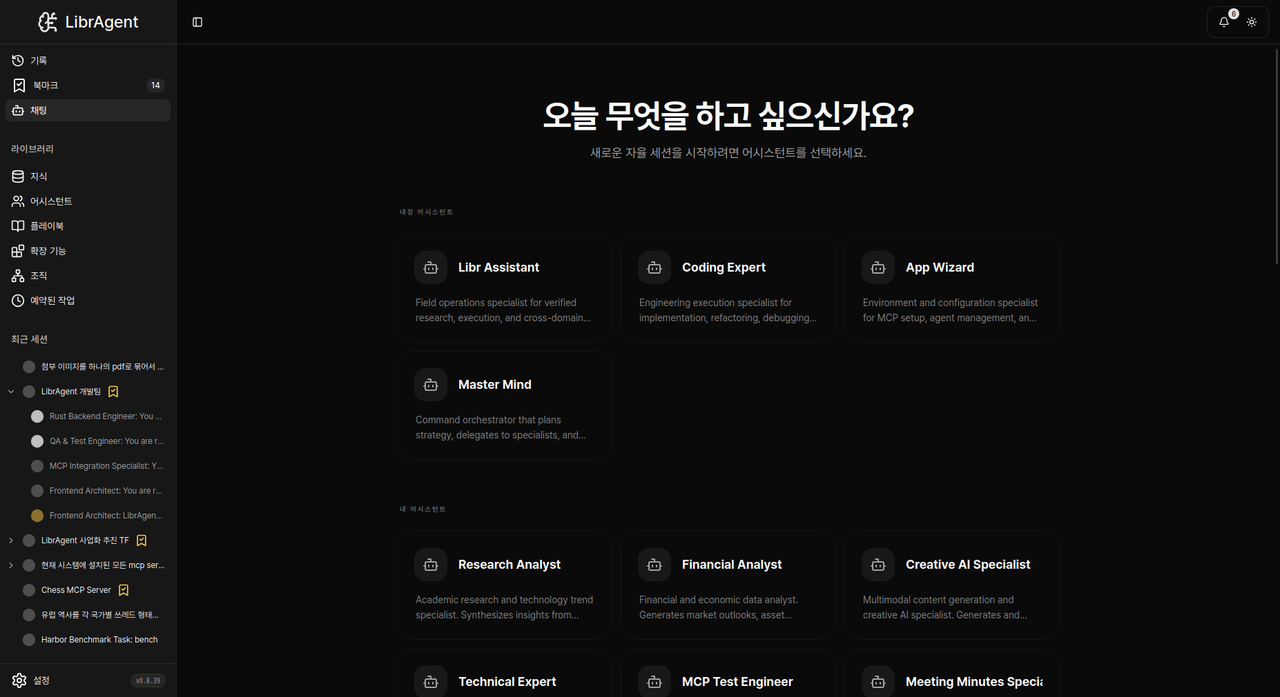
The left sidebar shows Chat, Settings, and more. Settings is sidebar → Settings, not a top-right gear alone.
Step 2: Connect a model (API key)
You need an API key to chat. Field details: Connecting models.
- Open Settings (
/settings). - Select the AI & Models tab.
- Under Provider API Keys, open a provider card (Anthropic, OpenAI, Google Gemini, …).
- Paste the API Key and click Save Changes.
- Under Model Preferences, choose Default LLM.
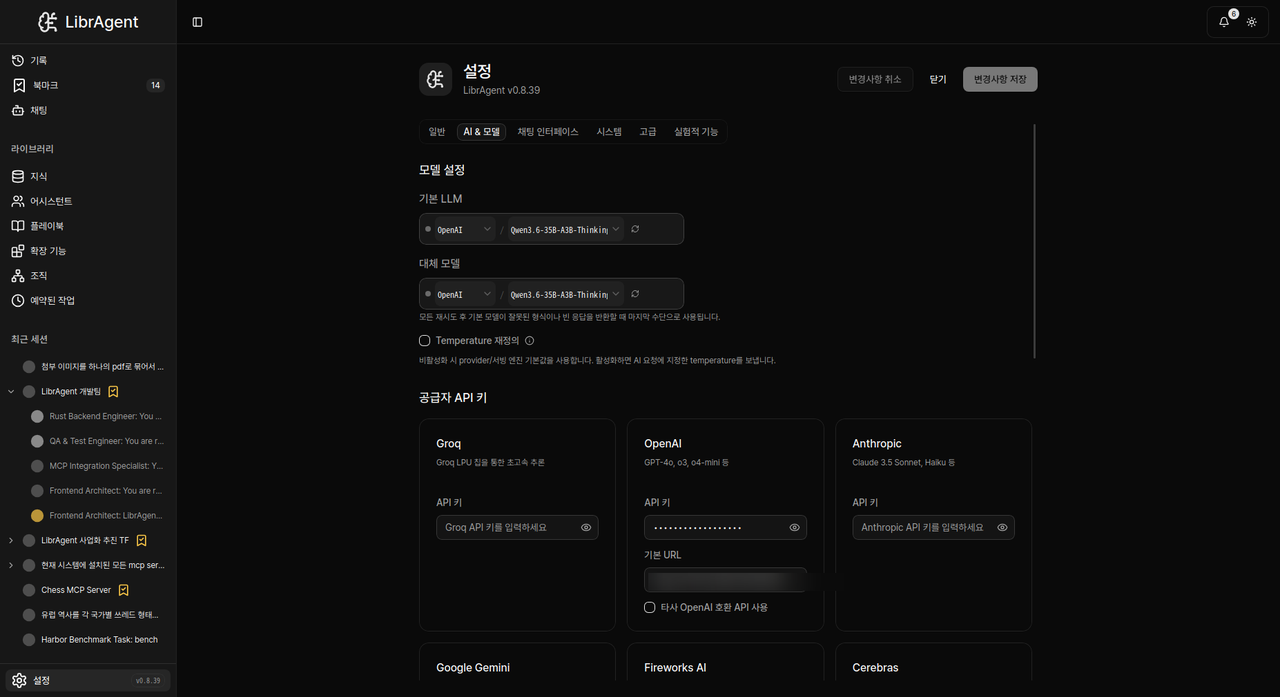
There is no menu named 「LLM Provider」. Keys live under Provider API Keys; the default model is Default LLM.
Step 3: Start your first session
- Open Chat.
- Click a card under Built-in Assistants (e.g. Libr Assistant, Coding Expert, App Wizard).
- The draft title is New Session. Type a message and send.
Hi! Who are you? Give a short intro.The agent typically thinks → (optionally) calls tools → returns a final answer.
There is no dedicated 「+ New Session」 button. Chat → pick an assistant starts a session.
Step 4: App Wizard and setup-wizard
There is no separate “install wizard” window. Use a built-in assistant and built-in tools.
App Wizard (assistant)
Chat → Built-in Assistants → App Wizard
- Role: environment / agent / MCP helper
- App copy: Environment and configuration specialist for MCP setup, agent management, and system readiness.
Example:
Check whether Python and Node are installed on this machine, and tell me how to install them if not.setup-wizard (builtin, alias bootstrap)
- Service name: setup-wizard (Setup Wizard Server)
bootstrapin README docs is an alias for the same service.- App Wizard uses it to detect the OS and guide Python / Node.js / uv installs.
Talk to App Wizard once before heavy coding/MCP use.
There is also a skill: @skill:setup-wizard. Full catalog: Skills.
Settings → Advanced → Shell runtime bootstrap (conda/nvm PATH) is a different feature. For install guidance use App Wizard / setup-wizard.
Done
| Next | Doc |
|---|---|
| Settings details | Connecting models |
| Chat / sessions | First agent chat |
| Symptom fixes | Troubleshooting |
End-user guide. Contributor setup: getting-started.md.